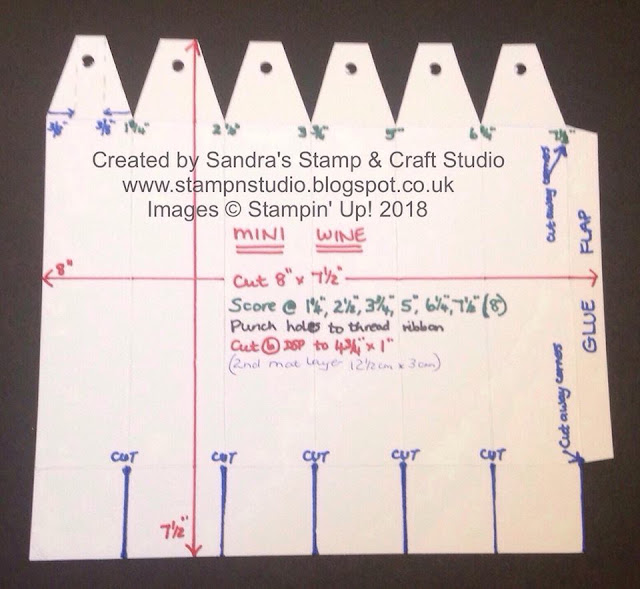
2. With long side at the top, score at 1-1/4″, 2-1/2″, 3-3/4″, 5″, 6-1/4″ and 7-1/2″.
3. Turn 1/4 turn. Score at 1-1/4″ across top and bottom.
4. Snip up the bottom blue lines where indicated up to the 1-1/4″ score line. Cut away two small corner sections as indicated.
5. On the top flaps, measure in 3/8″ from each flap edge as indicated on template. Cut away these on the angle as indicated.
6. Place a ruler 3/8″ down from the top, marking a pencil dot in the centre where hole will be punched for ribbon. Punch holes as indicated.
7. Place adhesive where marked GLUE FLAP and connect together to make a tube.
8. Fold in all bottom flaps to form a base. I prefer to attach the two opposites in pairs, holding glue area with tweezers until secure.
9. If you wish to make your own washers round the ribbon holes, punch spaced holes in coordinating colour. Re-punch centred over the top, using 1/2″ circle punch. This will make washers to glue round outside box holes.
10. To decorate cut one mat layer at 4-3/4″ x 1″. If you require two layers, cut the middle one to 12.5cm x 3cm (sorry to mix inches and cm, but this worked better !)
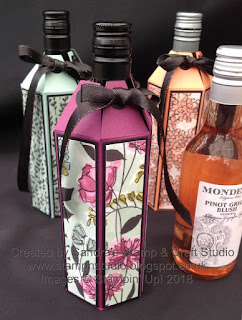
11. Insert miniature wine bottle and thread ribbon. Tie with bow to fasten.
12. With the larger version, I have reinforced the base with scallop circles. This size is not heavy enough to warrant extra strength, but you can do if you wish, using TWO Layering Circles Framelits #141705, slightly bigger than the base.


I live in the middle of a wine growing region in New Zealand. I can see this project being a winner. Thank you for sharing all yourvpainstaking work.
wOW THAT IS SO CUTE!
So pleased you enjoyed. x
Thank you x
This is a great tutorial – thanks for sharing it!
Glad you enjoyed. Have fun making !